
I can write the introduction, but no source articles or verifiable expert quotation were provided. Please share a source or expert name so I can include an accurate quote without inventing an attribution.
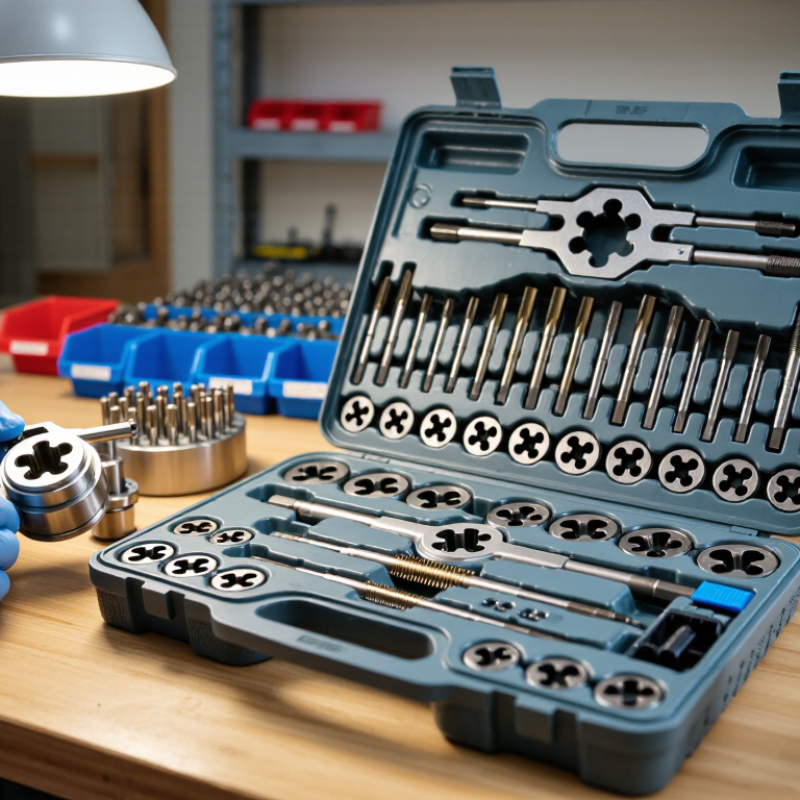
A thread repair kit is designed to restore damaged internal threads so a bolt can engage securely again. Most kits include a drill, a special tap, an installation tool, and replacement inserts. Some use coiled wire inserts; others use solid sleeves. The right type depends on the original thread size, pitch, hole depth, and the material surrounding the hole. Not a universal fix. A kit for a small aluminum housing may not suit a deep, heavily loaded steel joint. Measure twice. Compare the kit’s stated dimensions with the fastener, and check whether the hole is blind or passes through the part.
These kits are useful for worn or stripped threads in repairable parts, such as an equipment cover or a vehicle bracket. They cannot reliably repair every kind of damage. A cracked hole, badly enlarged bore, or joint carrying a critical load may need a different repair or expert inspection. During installation, keep the drill and tap aligned with the original hole; a slight angle can leave the fastener sitting crooked. Remove chips before fitting the insert, then test with the matching bolt by hand. The choice can feel less obvious than the packaging suggests, especially with soft metals. That uncertainty is worth respecting: a neat-looking insert does not prove the joint is safe under load.
Standard tap-drill sizes for common metric coarse threads are shown for reference. Thread-insert kits may require a different drill size and a specialized tap, so check the kit’s specifications for the exact thread size and pitch before drilling.
A thread repair kit must match more than the nominal diameter. Check the thread pitch, form, direction, and usable hole depth against the damaged hole. A 10 mm coarse thread and a 10 mm fine thread are not interchangeable. Small details matter. Compare the kit’s drill and tap sizes with its instructions, and confirm the insert length will not protrude into a blind hole or interfere with nearby parts.
Material matters just as much. A kit intended for aluminum may not suit a high-load steel component, and dissimilar metals can corrode when moisture is present. ISO 898-1 specifies a minimum tensile strength of 800 MPa for property class 8.8 steel fasteners; that rating describes the fastener, not the repair insert. NASA’s Fastener Design Manual, RP-1228, also explains why joint strength depends on factors such as engagement and material. Use those references as context, then check the component maker’s specifications. I would double-check the parent metal and operating temperature, too. It is easy to focus on size and overlook them.
| Buying Tip | What to Check | Example or Practical Guidance |
|---|---|---|
| 1. Identify the thread standard | Confirm whether the damaged thread is metric, Unified inch, or another standard before choosing a kit. | Metric threads are specified in millimeters; Unified threads use inch-based designations such as UNC or UNF. Do not assume that similar-looking sizes are interchangeable. |
| 2. Match the nominal diameter and pitch | Check both the thread’s nominal size and its pitch. A diameter match alone is not enough. | Common metric coarse sizes include M6 × 1.0, M8 × 1.25, and M10 × 1.5. The kit must match the original thread specification. |
| 3. Distinguish coarse and fine threads | Verify the thread series and pitch, especially when buying an inch-size kit. | For example, 1/4-20 UNC and 1/4-28 UNF have the same nominal diameter but different pitches, so a repair kit for one is not a substitute for the other. |
| 4. Check what the kit includes | Look for the correct repair tap, drill-size guidance, installation tool, and inserts or plugs required for the chosen repair method. | Many wire-insert systems use a special STI tap to form the insert’s outer thread while preserving the specified internal thread for the fastener. Follow the kit instructions rather than selecting a tap by appearance. |
| 5. Consider the parent material | Account for the material surrounding the damaged hole and the amount of material available for the repair. | Aluminum and other softer materials may benefit from a suitable threaded insert, but the repair must have enough wall thickness and clearance for the specified drill and tap sizes. |
| 6. Match insert material and service conditions | Check the insert material and any application requirements, such as corrosion exposure, temperature, or repeated assembly. | Stainless-steel inserts are commonly available, but the appropriate choice depends on the surrounding material and operating environment. Confirm material compatibility for the specific application. |
| 7. Verify depth, clearance, and repair method | Measure the usable hole depth and check whether the repair is blind or through-hole before buying. | Confirm that the insert length, drilling depth, and installation method suit the part. Use the specified drill depth and tapping procedure, and avoid damaging nearby features or breaking through a blind hole. |
A thread repair kit should match the damaged thread’s diameter and pitch, not just the bolt size. Check both before ordering. Small details matter. Wire inserts use a dedicated tap and installation mandrel, and many require a tang-break tool. They suit many repairs where preserving surrounding material matters. Solid inserts are sturdier, but often need a larger drilled opening and a different installation method. Compare the repair space and base material before choosing.
Look closely at the included tools. A useful kit may contain a correctly sized drill bit, insert tap, installer, depth guide, and replacement inserts. Some kits omit a handle or require a separate tang-removal punch. That can slow a repair halfway through. For repeat work, check whether replacement inserts are easy to source in the same length and thread size. A thread gauge can help confirm the fastener fit, though it does not replace careful measurement.
Match the insert length to the available hole depth; a long insert can interfere with a blind hole’s bottom. Read the maker’s instructions for drilling depth and tapping technique, especially in softer metals such as aluminum. I’ve found that rushed alignment causes more trouble than the insert itself. Still, kits vary, and a tool that feels awkward in your hand may not improve with practice. Inspect the components before starting.
A thread repair kit earns its place by surviving repeated use, not by looking substantial in its case. Check whether the taps, inserts, and installation tools are made from hardened steel, and inspect their edges for clean, even machining. Rough cutting edges can damage a hole instead of restoring it. Small parts matter.
Ease of use depends on a clear sequence and accurate sizing. Look for a readable size chart, a drill-size reference, and instructions that explain how deep to cut. Try matching the kit to a spare bolt before starting a repair; the thread pitch must match, not just the diameter. A handle with a comfortable grip also helps when working in a cramped engine bay or under a sink. Still, no kit can reliably fix a cracked part or a hole that has become too wide.
Storage affects how long the tools stay useful. A fitted case keeps inserts from scattering and protects cutting edges from knocks. Check that each size has a marked slot, especially if the labels are small. Keep the kit dry, wipe tools after use, and replace missing pieces promptly. An awkward case is easy to ignore—until parts go missing. Before buying, consider where you will store it and which thread sizes you actually encounter.
A thread fix kit should match the damaged thread, not just the tool drawer. Check the thread diameter and pitch against a fastener or a reliable repair reference. Metric and imperial sizes can look deceptively similar. Confirm the kit includes the correct drill, tap, and installation tool; missing one can turn a low price into extra expense. Also check the usable thread depth. A long insert may not fit a shallow hole.
Think about how often you will use the kit. For one repair, a compact set with a few inserts in the exact size may be enough. For regular workshop use, a broader kit can cost less over time, especially if replacement inserts are easy to find. Compare the contents, case quality, and clear instructions, not only the price. The workpiece material matters too: aluminum may need a different approach from steel. Keep the hole clean, follow the specified drill size, and test the repair with the fastener by hand. A little patience helps. It is tempting to buy the biggest kit for flexibility, but unused sizes can sit untouched for years. Match the kit to the repair you can actually identify, and leave room to reconsider if the thread specification is uncertain.
1901 West Main Street
Washington, MO 63090
Main Directory: 1-800-227-4873
Email: sale@pangcofurniture.com

We’re always looking for talented individuals to join our team. Send us your resume using the form below. When a position comes available that matches your skillset, one of our team members will reach out to you.
"*" indicates required fields