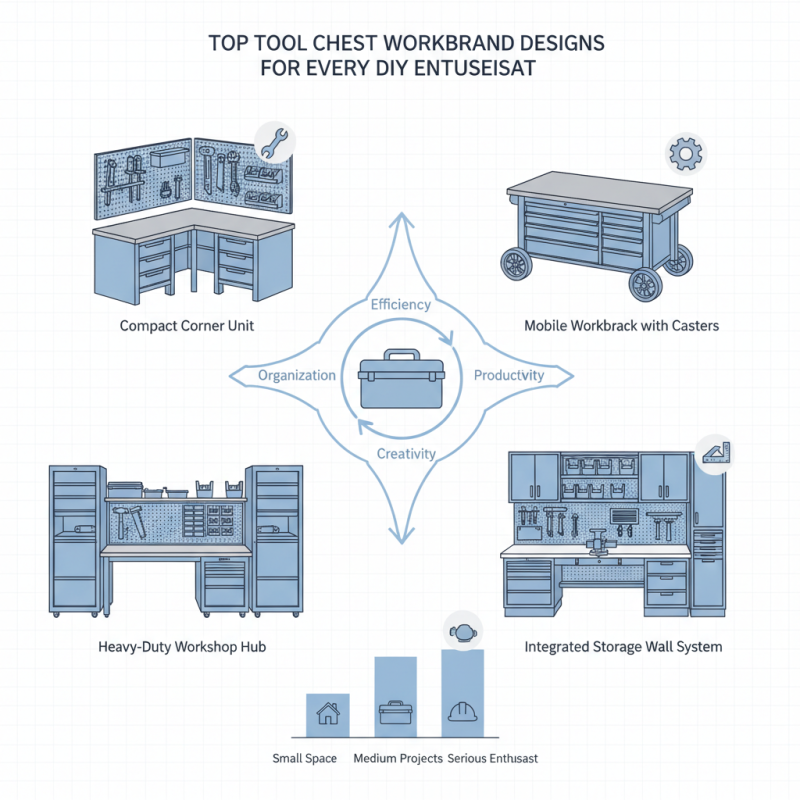
Top Tool Chest Workbench Designs for Every DIY Enthusiast?
Creating an efficient workspace is crucial for every DIY enthusiast. A well-designed tool chest workbench can significantly enhance productivity. These workbenches combine storage and workspace elegantly, catering to various projects and needs.
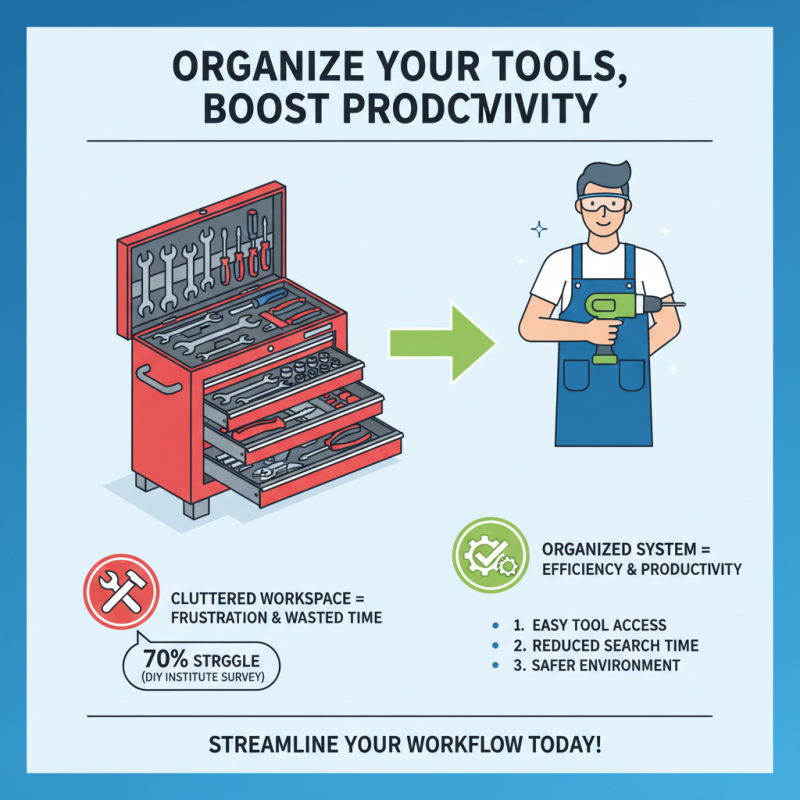
When choosing a tool chest workbench, consider the layout. Ideal designs include ample storage for tools and materials. Many DIY enthusiasts overlook the importance of organization. Too often, clutter accumulates. This can hinder creativity and efficiency.
Exploring different designs helps find the perfect match. Some workbenches are compact, making them suitable for small spaces. Others offer extensive storage, ideal for serious projects. Reflecting on personal needs can lead to better choices. Ultimately, a functional tool chest workbench can transform any workspace into a DIY haven.
Essential Features of a Top Tool Chest Workbench for DIY Projects
When designing the perfect tool chest workbench for DIY projects, essential features should not be overlooked. A sturdy surface is crucial. The workbench should be solid enough to withstand heavy tools and activities. Reports indicate that a workbench height of about 36 inches suits most users. This ensures comfort during projects.
Storage plays a vital role too. Multiple drawers and compartments help organize tools. Statistics show that organized workspaces can boost productivity by as much as 20%. Keep frequently used tools within reach. This minimizes time wasted searching for necessary items. A pegboard can also enhance organization.
Tip: Consider integrating a power strip into your design. This allows easy access to electricity, making it seamless to use power tools.
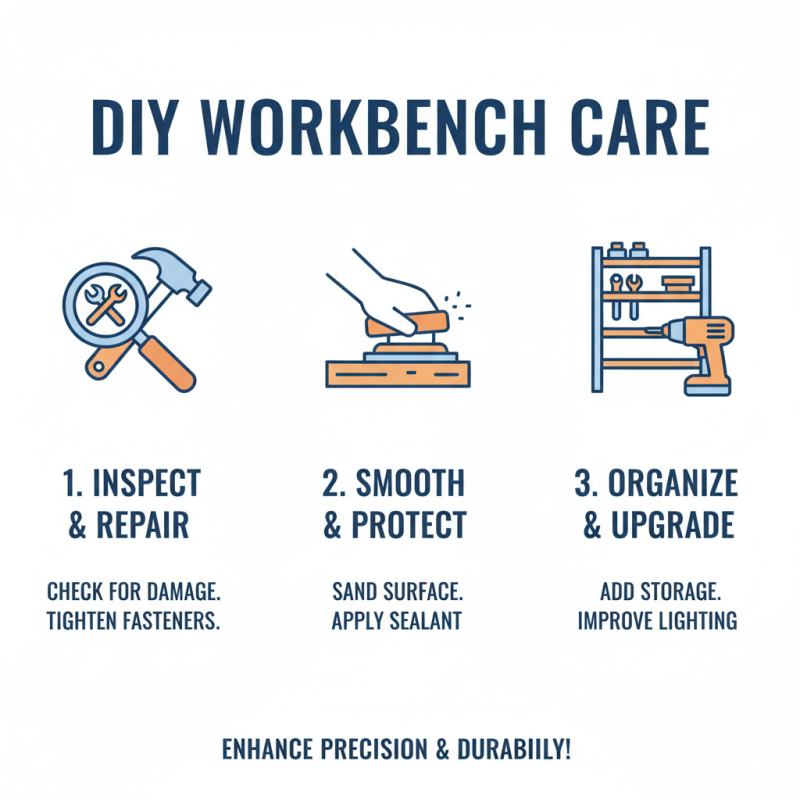
Lighting should not be neglected. Proper illumination reduces eye strain during detailed tasks. Aim for a bright, focused light source above your work area. Remember, a cluttered workspace not only affects efficiency but also safety. Regularly assess your layout. A small tweak can significantly improve functionality.
Top Tool Chest Workbench Designs for Every DIY Enthusiast
| Workbench Design | Dimensions (L x W x H) | Material | Storage Features | Weight Capacity |
|---|---|---|---|---|
| Compact Folding Workbench | 30" x 20" x 29" | Wood and Metal | 1 Shelf, 2 Drawers | 300 lbs |
| Heavy-Duty Workbench | 60" x 30" x 36" | Steel | 3 Shelves, 4 Drawers | 1500 lbs |
| Mobile Workbench | 48" x 24" x 34" | Wood | 2 Cabinets, 1 Drawer | 500 lbs |
| Corner Workbench | 50" x 50" x 36" | Laminate | Open Shelving | 600 lbs |
| Workbench with Tool Storage | 72" x 24" x 34" | Plywood | Big Top Drawer, 6 Pegboards | 1000 lbs |
Related Posts
-
How to Choose the Best Rolling Workbench for Your Workshop Needs
-
14 Best Rolling Work Benches for Ultimate Workspace Efficiency
-

2025 Market Insights: The Evolution of the Best Rolling Work Bench in Global Industries
-

7 Best Garage Work Bench Solutions for Every DIY Enthusiast
-
How to Choose the Ideal Tool Chest Workbench for Your Workshop Efficiency
-
How to Choose the Perfect Rolling Workbench for Your Workspace
Footer
Affiliations