What Is a Tool Workbench and How Do You Choose One?

A tool workbench is more than a flat surface; it is the working center of a workshop. It needs to support your projects, keep tools within reach, and stay steady during demanding tasks. For a homeowner repairing a bicycle, that may mean a compact bench with a vise and a few drawers. For a woodworker, a larger, heavier surface may matter more. Small details matter. A bench that wobbles while you saw can quickly become frustrating.

Choosing one starts with the work you actually do, not the features in a product photo. Measure the available floor space, including room to open drawers and move long materials. Check the bench’s load rating and compare it with the weight of your tools and projects. Consider worktop material, height, storage, and whether the design accepts a vise or accessories you already own. A thick top can look reassuring, but thickness alone does not prove quality; that shortcut can overlook weak joints or an unstable frame. Good fit matters.

There is no single best workbench for every workshop. A portable model may suit occasional repairs, while a fixed bench can offer more stability for regular, forceful work. Read specifications carefully, and look for clear assembly instructions and warranty information. If possible, inspect the frame, joints, and work surface in person. Even careful research has limits: product descriptions cannot show exactly how a bench feels during your own tasks. This guide explores common workbench types, practical selection criteria, and trade-offs to consider before buying. The aim is a dependable choice, not a perfect one.
What Is a Tool Workbench and How Do You Choose One?

What Defines a Tool Workbench? Core Parts, Uses, and Common Types

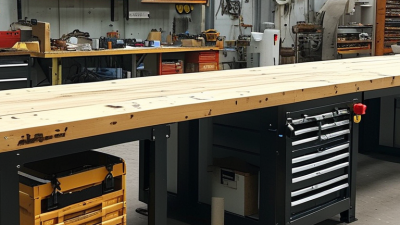
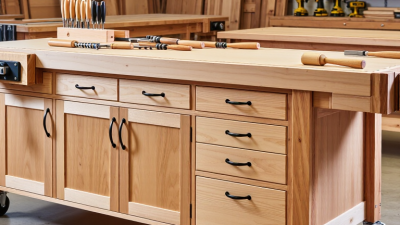
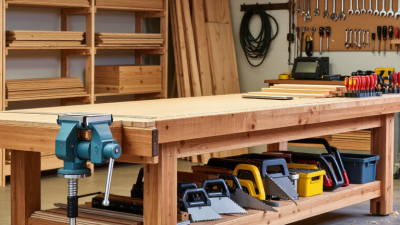
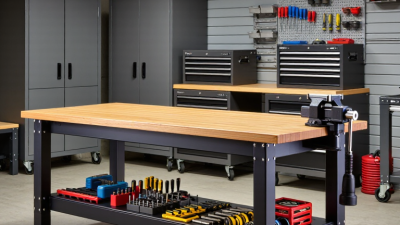
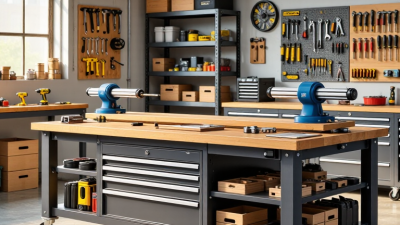
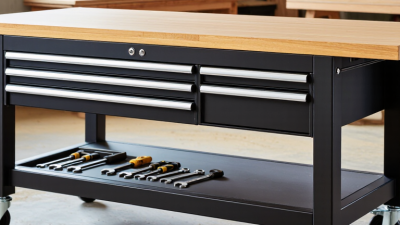
A tool workbench is a stable, organized surface for assembling, repairing, or maintaining equipment. Its core parts usually include a load-bearing top, a rigid frame, storage drawers, and task lighting. Pegboards keep frequently used tools visible; a vise holds parts steady during cutting or filing. Common types include fixed benches for heavy work, mobile benches for shared spaces, height-adjustable models, and specialist benches for electronics. Choose by task, not appearance. A glossy top is not automatically durable.

Safety belongs in the design.

The U.S. Bureau of Labor Statistics reported 2.6 million nonfatal workplace injuries and illnesses in private industry in 2023. That figure does not prove that benches prevent injuries, but it underlines why stable surfaces, clear storage, and suitable working height matter. Check the rated load, bench depth, floor stability, and lighting. For fine assembly, a bright, low-glare lamp helps reveal small parts; for heavier repairs, a thick top and secure vise matter more. I would measure the largest item being serviced before buying. Easy to overlook.

Tips: Keep daily-use tools within arm’s reach, and store heavier items low. Leave one clear section of the surface for active work. Reassess the layout after a week; real routines often expose flaws that a checklist misses.

How to Match Bench Height, Reach, and Layout to the Work

A tool workbench is more than a flat surface; its height, reach, and layout shape how safely and accurately you work. Your elbows should stay relaxed during routine tasks, without forcing your shoulders upward or your back into a constant bend. For fine work, a slightly higher surface can bring small parts closer to your eyes. For filing or planing, a lower bench may give you better leverage. That difference matters.

Reach is easy to misjudge. Keep frequently used tools within a comfortable arm’s reach, but leave enough clear space to handle long stock or larger assemblies. Place a vise where its jaws won’t block your hands, and check whether drawers remain accessible when a clamp is attached. A little trial helps. There is rarely a perfect layout; a vise may claim the space your hands need.

Match the bench to the work you actually do, not an idealized workshop. Measure your usual working height, then test it with a representative task before fixing equipment in place. Notice where your wrists, shoulders, and feet settle after several minutes. If you switch between seated detail work and standing assembly, an adjustable surface or separate work zones may help. Even careful measurements can miss a small annoyance, such as a tool handle catching on a shelf.

Workbench Height: Match the Surface to the Task

Common ergonomic starting ranges for standing work, measured relative to the worker’s elbow height.

How to use this: Precision work often benefits from a higher surface, while heavier work is easier with a lower one. These are planning ranges, not fixed standards; test the height with the actual worker and task. Keep frequently used tools close and within easy reach, and place occasional-use items farther away.

How to Compare Materials, Dimensions, and Rated Load Capacity

A tool workbench should fit the work you actually do, not just the space available. Steel frames resist dents and suit heavy equipment, while solid wood tops absorb vibration and can be resurfaced after years of cuts. Stainless steel handles moisture and wipes clean, but it may cost more and feel loud under striking tools. There is no perfect surface. Oil, glue, and metal filings can make even a sturdy bench look rough quickly.

Measure the bench area, then leave room to move around it and open drawers. A 24-inch-deep top may suit a narrow garage, but larger projects often need more support. Match bench height to the task: standing assembly usually feels better when your elbows rest near the work surface. Check legroom and wall clearance, too. Small details.

Rated capacity needs careful reading. Some specifications describe evenly distributed weight, not a heavy machine placed on one corner. Compare the frame rating with the top’s capacity, and consider tools, materials, and downward force during use. A vise can concentrate load in one spot. Check the floor, too. If the rating is unclear, ask how it was tested rather than treating a large number as a guarantee. I would leave a margin for future tools; plans change, sometimes awkwardly.

How to Check Machine Guarding Under OSHA 29 CFR 1910.212

A tool workbench is only as safe as the machines and tasks it supports. Under OSHA 29 CFR 1910.212, employers must guard hazards such as points of operation, rotating parts, and ingoing nip points. A grinder mounted at the bench, for example, needs protection from its wheel and a setup that keeps hands clear during use. Guards should be secured and must not create new hazards. A clean bench is not automatically a safe one.

The Bureau of Labor Statistics reported 738 fatal work injuries in the broad “contact with objects and equipment” category in 2023. That figure includes more than machine-related incidents, but it highlights why a careful hazard check matters. Inspect the tool’s working area, exposed belts or shafts, and the path of chips or sparks. Check that guards stay in place during normal operation and that workers can use controls without reaching across a hazard. Document defects and remove unsafe equipment from service until corrected.

Tips: Before choosing or arranging a workbench, test the actual task with the machine off. Look for gaps where fingers could reach moving parts, and confirm the bench is stable. Recheck after changing tools or workpieces. Small details matter. One awkward reach may reveal a flaw in the setup.

What Is a Tool Workbench and How Do You Choose One? — How to Check Machine Guarding Under OSHA 29 CFR 1910.212

Topic or Check What to Evaluate Practical Check or Selection Guidance Relevant OSHA Reference
Purpose of a tool workbench A workbench is a stable work surface for organizing tools, assembling parts, and supporting suitable tasks. It does not, by itself, guard a machine. Choose a bench that suits the work, tools, materials, available space, and required storage. Assess each machine separately for hazards and safeguards. 29 CFR 1910.212(a)(1)
Work surface and task fit Consider surface dimensions, material, resistance to the substances used, and whether the work requires a flat, non-slip, or replaceable surface. Check that the surface accommodates the largest routine workpiece and allows the operator to work without blocking machine controls or safety devices. No specific workbench dimensions are prescribed by 1910.212.
Load capacity and stability Confirm the bench’s stated load rating and consider the combined weight of the workpiece, tools, fixtures, and stored items. Use the manufacturer’s capacity information. Check that the bench is stable for its intended use and that drawers or stored items do not make it unstable. 1910.212 does not specify a general workbench load rating.
Workbench location and access Consider safe access, aisle clearance, lighting, nearby equipment, and space needed to handle materials. Keep the work area orderly and make sure bench placement does not obstruct machine guards, emergency controls, or safe access to equipment. Machine guarding requirements apply to machinery; 1910.212(a)(1) addresses guarding methods.
Identify machine hazards Inspect machinery used on or near the bench for points of operation, in-running nip points, rotating parts, and flying chips or sparks. Observe the machine through its operating cycle and identify where an employee could contact a hazard. Include hazards created by the workpiece or tooling. 29 CFR 1910.212(a)(1)
Point-of-operation guarding The point of operation is the area where the machine performs work on the material. The guard must protect employees from the danger zone. Check that the guard or other safeguarding method prevents any part of the operator’s body from entering the danger zone during the operating cycle. 29 CFR 1910.212(a)(3)(i)–(ii)
Guard design and condition Guards should be designed and positioned for the specific machine and hazard, and should not create a hazard of their own. Look for missing, damaged, loose, bypassed, or poorly positioned guards. Confirm guards are secured and remain effective during normal operation. 29 CFR 1910.212(a)(2)–(3)
Guarding method OSHA recognizes methods such as barrier guards, two-hand devices, and electronic safety devices, where appropriate to the machine and task. Verify that the selected method protects employees from the hazard and is suitable for the machine’s operating cycle and work process. 29 CFR 1910.212(a)(1)
Power transmission and rotating parts Check exposed belts, pulleys, chains, gears, shafts, and other moving parts that may present contact hazards. Confirm that applicable guarding is in place and secured, and that employees cannot readily reach hazardous moving parts during operation. 29 CFR 1910.212(a)(1)–(2)
Hand tools and reach-in practices Special hand tools may help place or remove material from a point of operation, but they are not a substitute for required guarding. Do not rely on push sticks, tongs, or similar tools as the sole safeguarding measure where machine guarding is required. 29 CFR 1910.212(a)(3)(iii)
Pre-use inspection and follow-up Check guards and safeguarding devices before work and after maintenance, adjustment, or a process change. Document hazards found, corrective actions, and follow-up checks according to the workplace’s safety procedures. Do not operate equipment with ineffective guarding. Supports compliance with 29 CFR 1910.212; the standard’s requirements depend on the machine and hazard.

This table is a general selection and inspection aid, not a substitute for evaluating the specific machine, operation, and applicable OSHA requirements.

How to Assess Work-Surface Safety Under OSHA 29 CFR 1910.22

A tool workbench is only as safe as its surroundings. OSHA 29 CFR 1910.22 covers walking-working surfaces, not the bench top itself. That distinction matters. The standard requires floors to be clean and orderly, and dry where feasible. It also calls for regular inspections and prompt correction of hazards. Check the floor, access route, and standing area around each bench.

The Bureau of Labor Statistics’ 2022 Census of Fatal Occupational Injuries recorded 865 fatal work injuries involving falls, slips, and trips. This figure covers many work settings, not benches alone, but it highlights the risks of neglected floors. Look for oil, metal shavings, loose fasteners, and trailing cords near workers’ feet. Where wet processes occur, OSHA requires drainage and dry standing places, such as mats or platforms. Small details matter.

For the bench itself, check stability, sharp edges, and whether its load limit suits the work. These are practical checks, not specific requirements of 1910.22. A level tabletop can still hide a loose leg. Record inspections, defects, and repairs. Keep workers away from a hazardous area until it is corrected or safely guarded. A checklist helps, but it can miss the awkward corner behind a vise.